Understand and use multi-property management in bciti+
Solutions B-CITI Inc. · @Confidential
01
Overview
Understanding the Multi-Property feature at a glance
The Multi-Property feature now allows each citizen to register multiple addresses in bciti+ and choose which one is associated with their citizen card. Each property must be approved by your team before it can be used.
💡
In summary: More flexibility for citizens, more control for the city. You remain the approval authority for all addresses on your territory.
02
Available Features
What your citizens can do in the bciti+ application
🏠
Add a property
Request sent to the city
Submits a new address with documents. You receive the request for approval.
🔄
Renew a property
Linked to card renewal
Alert sent 2 months before expiration. Renewal extends the card.
🗑️
Delete a property
Except primary residence
Removes an address from the profile. If linked to a card, a new address must be chosen.
🔗
Change linked property
Among approved addresses
Changes the address on the active card. Residency status updates automatically.
📋
Apply for a citizen card
Existing property or new address
When applying for a card, uses an approved address or enters a new one. If the property doesn't exist yet, it is created automatically when the card is approved.
03
Citizen Guide — Property Management
Detailed flows with screenshots from the bciti+ application
Add a property
The citizen can add a new address from their profile in two steps: entering the address via autocomplete, then uploading proof of residence.
1
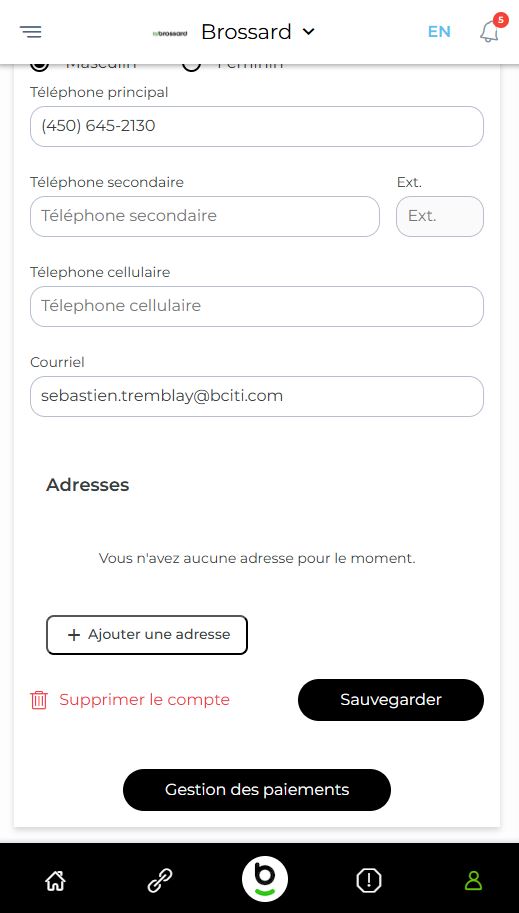
The citizen goes to their profile and scrolls down to the Addresses section, then taps + Add an address
2
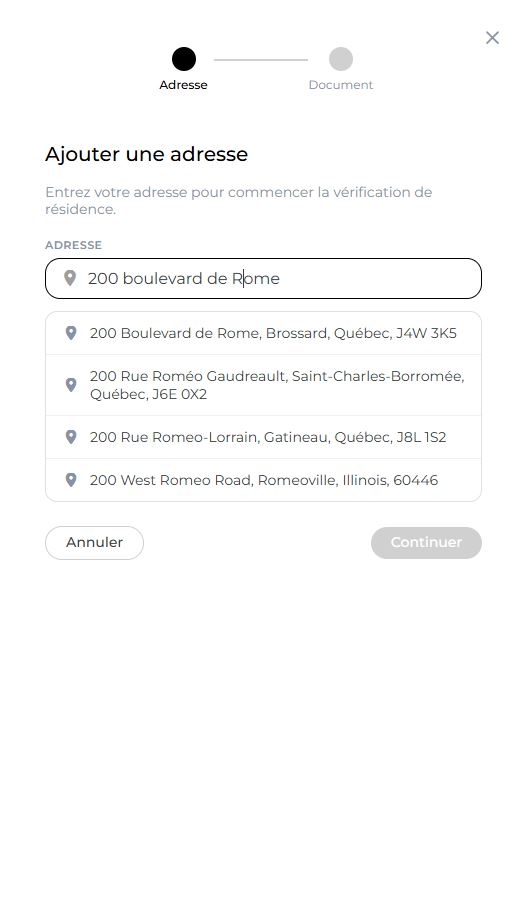
They type their address in the search field — suggestions appear as they type
3
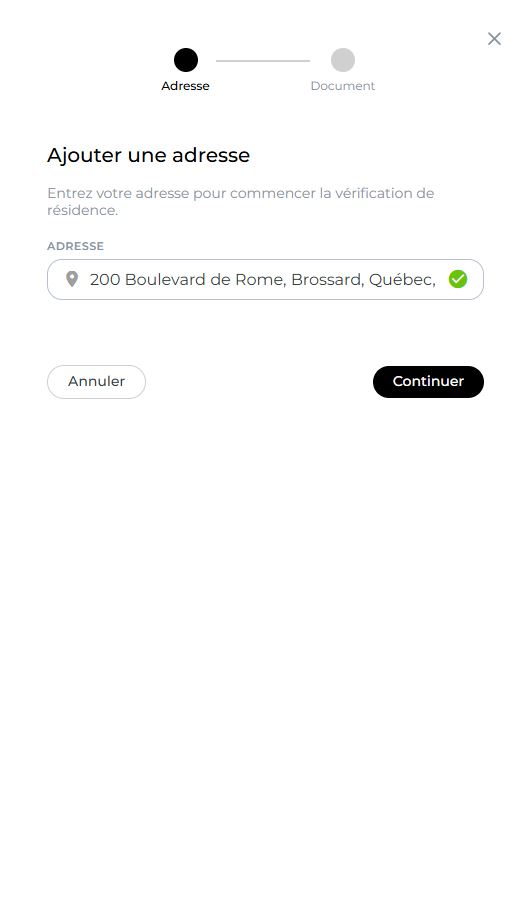
They select the correct address from the list — a green checkmark confirms their choice, and the Continue button becomes active
4
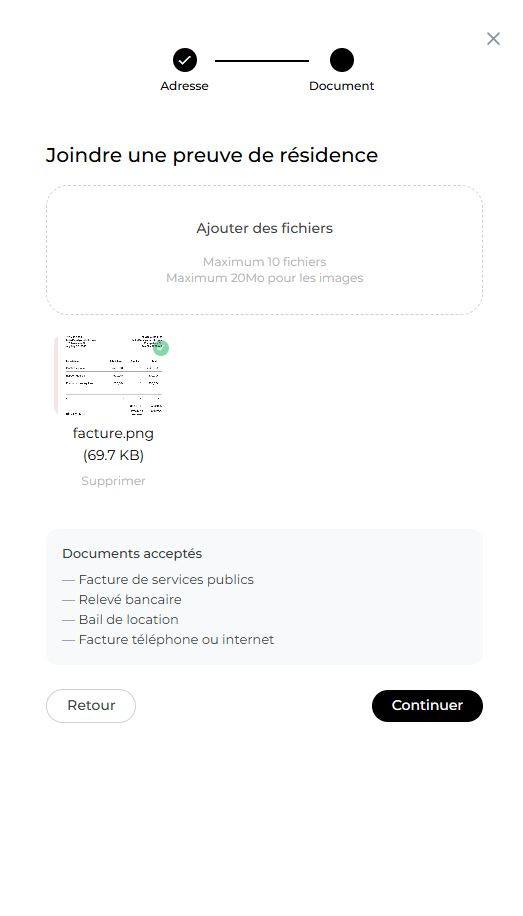
They attach a document proving they live at this address (utility bill, bank statement, lease…) then tap Continue
5
A confirmation screen tells them their request has been sent — they will receive a notification once verification is complete
6
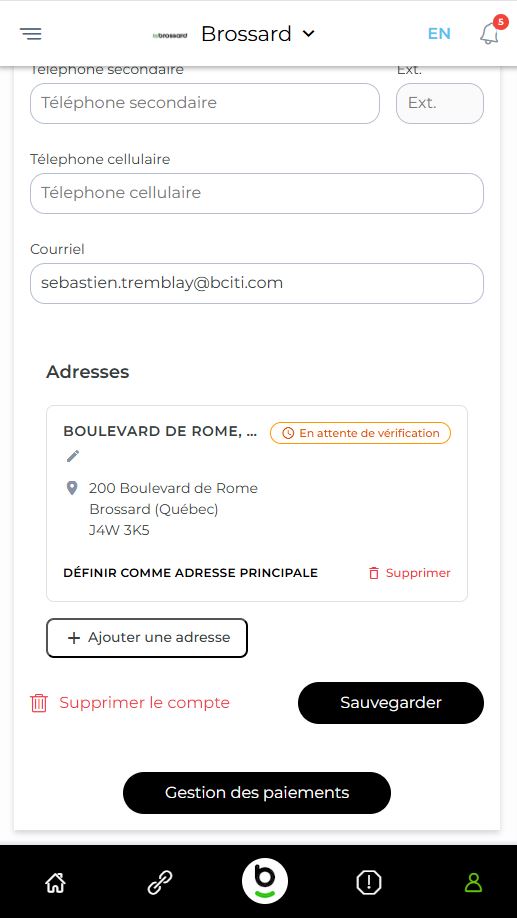
Back in their profile, they see their new address with the badge ⏱ Under review
📬
The citizen receives a notification as soon as you have approved or rejected their request. You can also provide a reason in case of rejection.
Step 1The citizen has no address registered in their profile yet
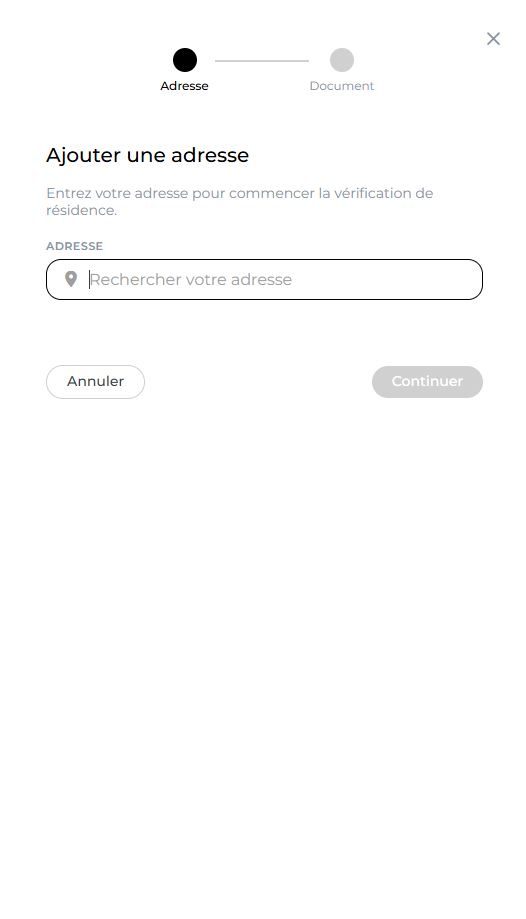
Step 2The form opens — the citizen starts typing their address
Step 2 (cont.)Suggestions appear as they type
Step 3The citizen has chosen the correct address — the green checkmark confirms their selection
Step 4aThe citizen must now attach a document proving they live at this address
Step 4bThe document is attached — they can remove it if they made a mistake before sending
Step 5The request is sent — the citizen knows they will be notified once the city has processed it
Step 6The address is now visible in their profile, pending your approval
Rename a property
The citizen can give a custom name to each address to find it easily. This name is also visible on the admin side.
1
They tap the pencil icon ✏️ next to the name of the address they want to rename
2
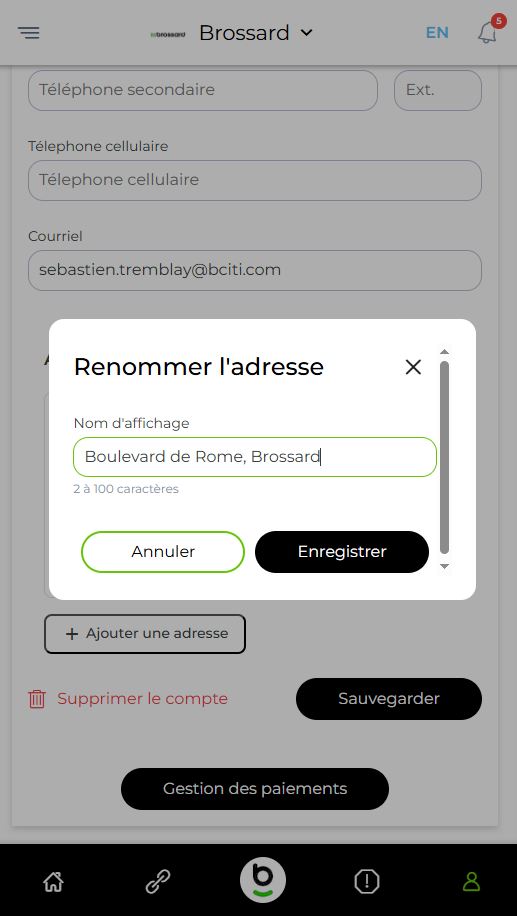
They enter the name they want to give it — for example Cottage, Office or Parents' place
3
They tap Save — the new name is visible in their profile and in the administrator portal
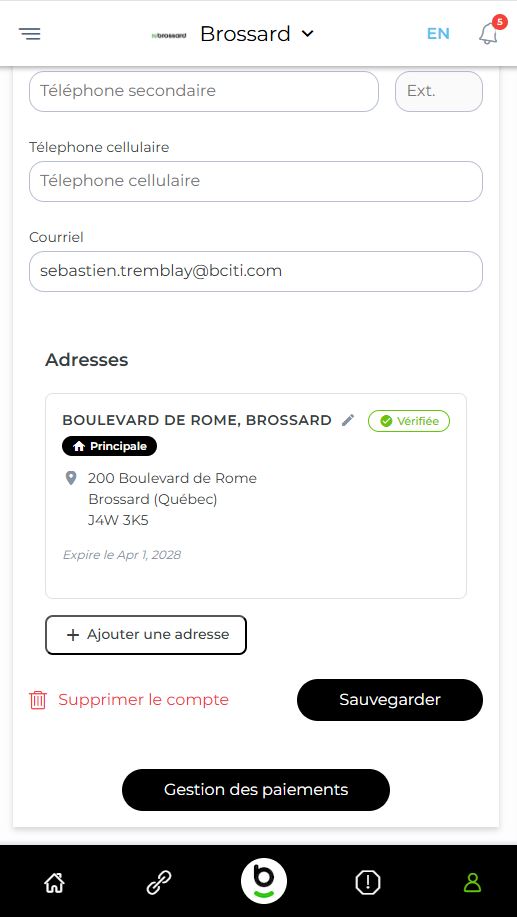
Approved addressThe address is verified by the city — the citizen sees the expiry date and knows when to renew
Rename the addressThe citizen can give a name that makes sense to them, like 'Cottage' or 'Office'
Change the property linked to the card
A citizen can change the address associated with their active citizen card at any time, from among their verified addresses.
1
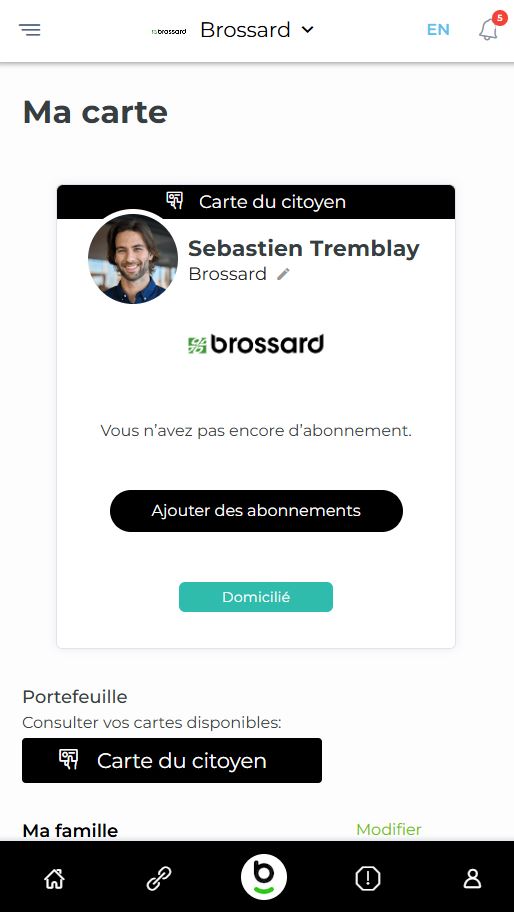
From the My Card screen, they tap the pencil icon ✏️ next to their city name
2
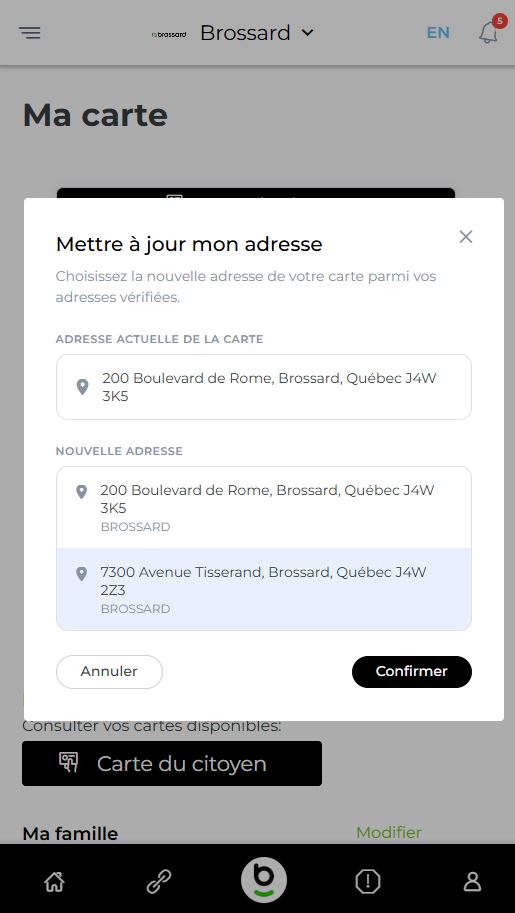
They see the list of their verified addresses and choose the one they want to link to their card
3
They tap Confirm — their card is updated immediately
⚠️
This change may modify the residency status displayed on the card. The change is immediately visible on the admin side.
My CardThe citizen sees their active card and can tap the pencil to change the linked address
Choose a new addressAll their verified addresses are listed — they simply choose and confirm
Apply for a citizen card with a property
When applying for a citizen card, the citizen selects their address and attaches the required supporting documents in 2 steps.
1
Identity: They verify their personal information and choose the address they want to link to their new card from their already approved properties
2
Supporting documents: They attach a valid ID (driver's license, identity card, etc.)
Step 1 — IdentityPersonal information and address selection from verified properties
Step 2 — Supporting documentsUpload of required identity documents
04
Administrator Guide — Municipal Portal
Property and card approval, and citizen file management
Approve a property
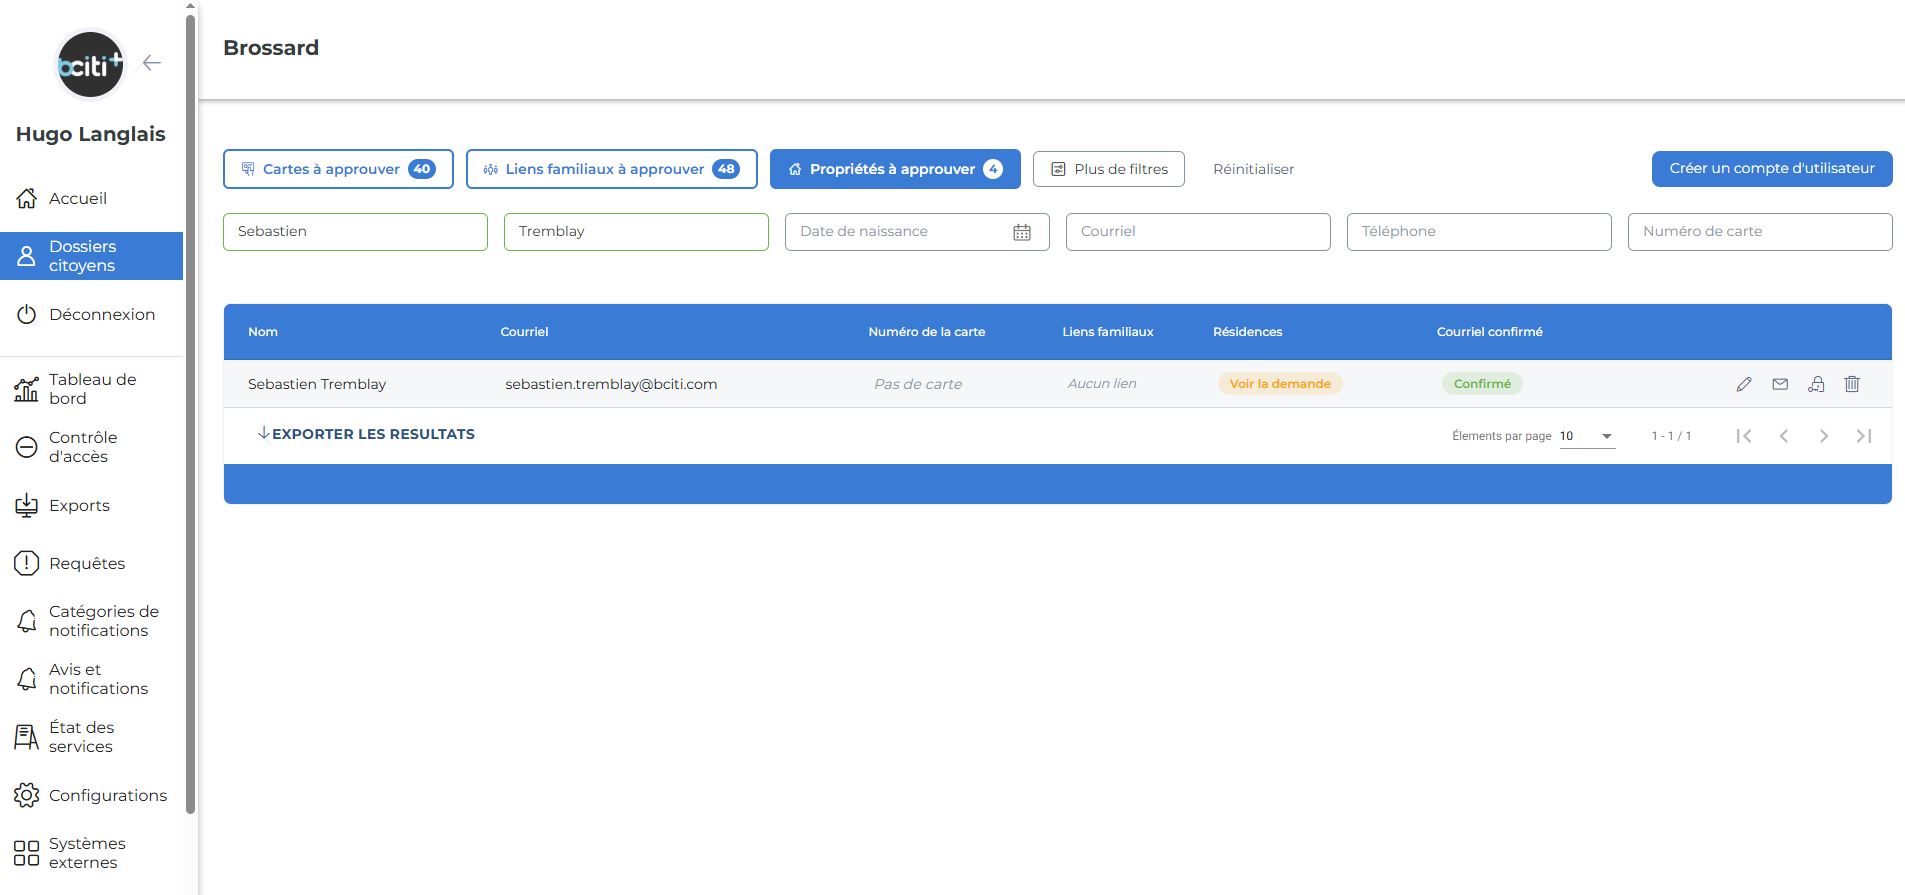
Every request submitted by a citizen appears in your dashboard under the Properties to approve filter. The counter shows the number of pending requests.
1
In Citizen Files, click the Properties to approve filter to see only pending requests, then click View request for the relevant citizen
2
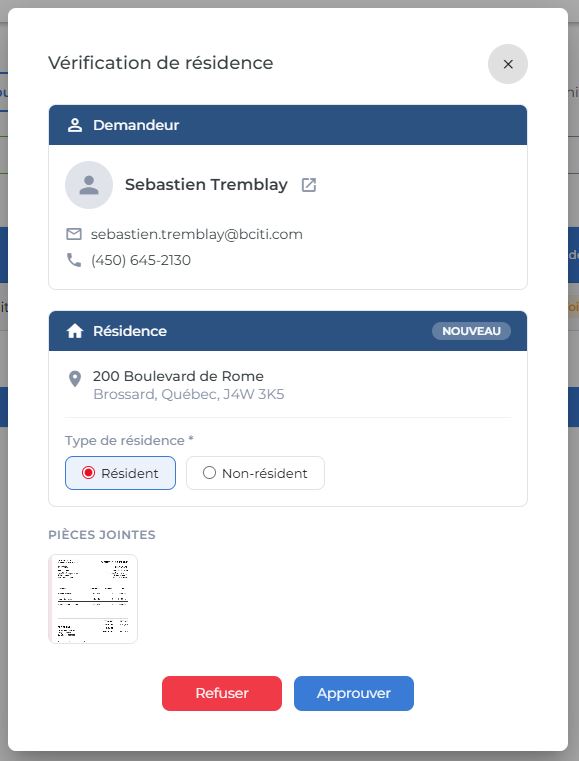
The dialog shows the citizen's contact info, the requested address, and the documents they attached — take the time to review them
3
Choose whether the citizen is a Resident or Non-resident according to your city's rules
4
Click Approve ✅ or Reject ❌ — in case of rejection, a reason can be communicated to the citizen
📬
The citizen is notified automatically. Once approved, the address appears in the admin profile with the Verified, Primary badges and residency status.
Pending requests The "Properties to approve" filter groups all requests that need your attention
Review the request Citizen contact info, address, attached documents and residency status selection
View a citizen profile
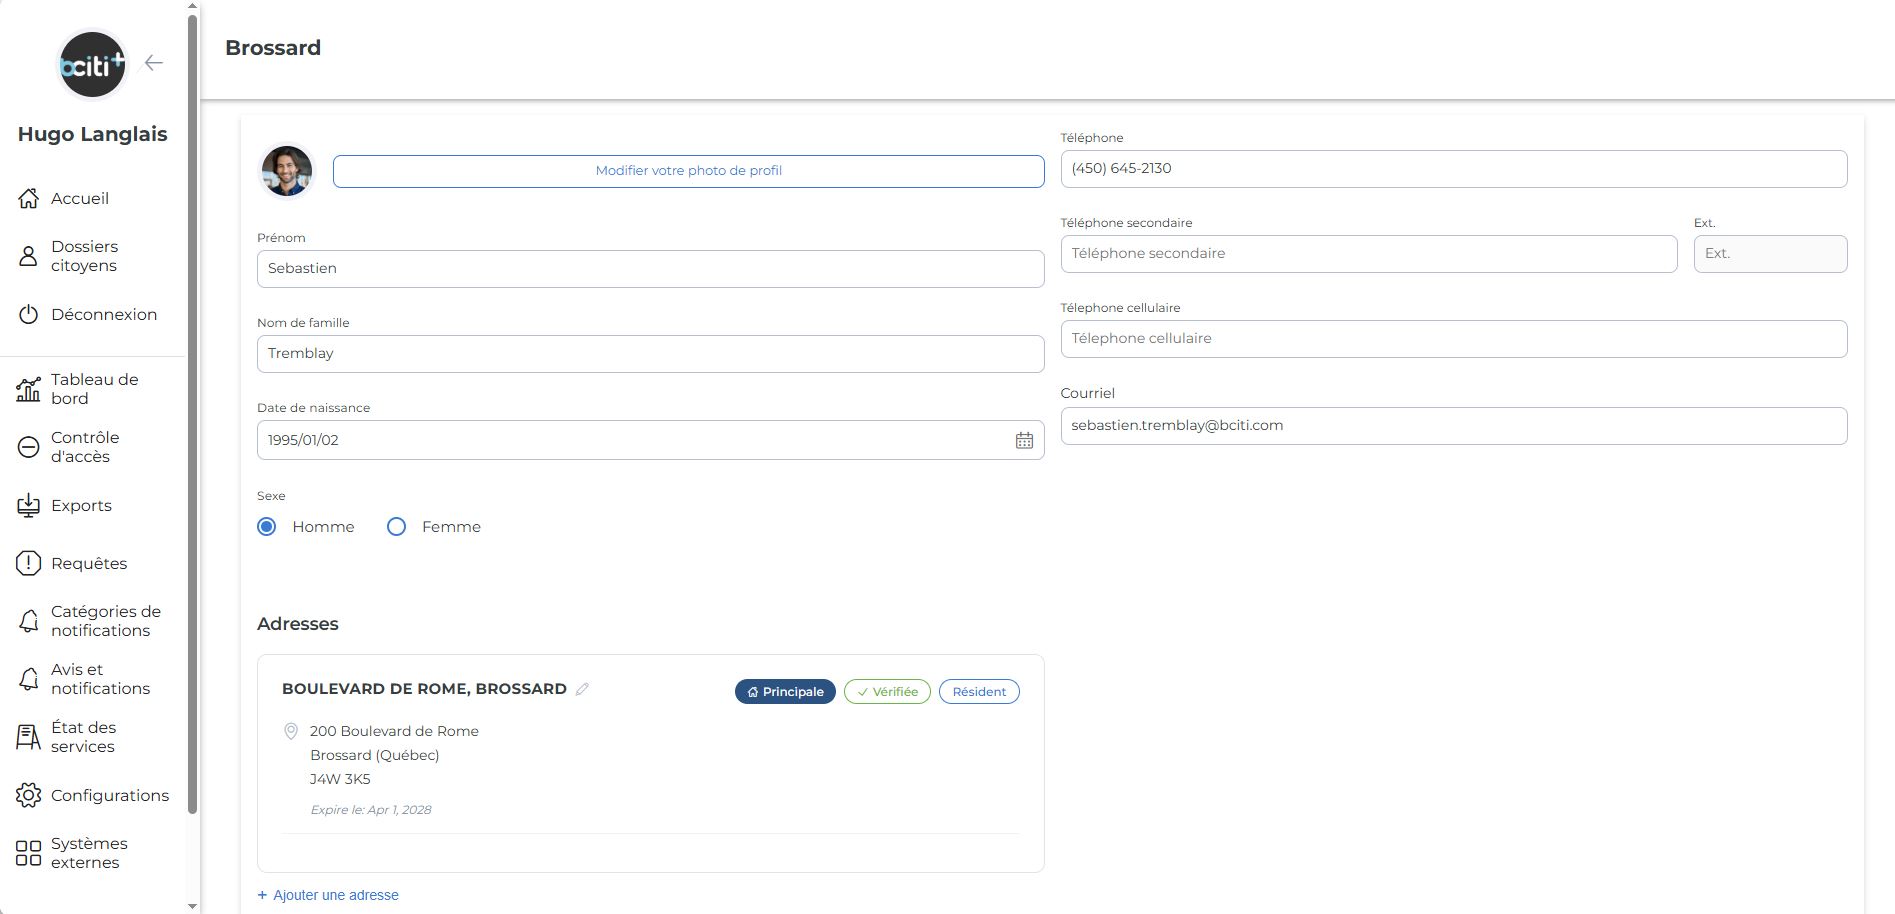
After approval, you can view the citizen's full profile from Citizen Files. All their properties are listed with their statuses, expiry dates, and links to active cards.
The citizen's full profile You see all their addresses, their status and expiry date — useful to get an overview before making a decision.
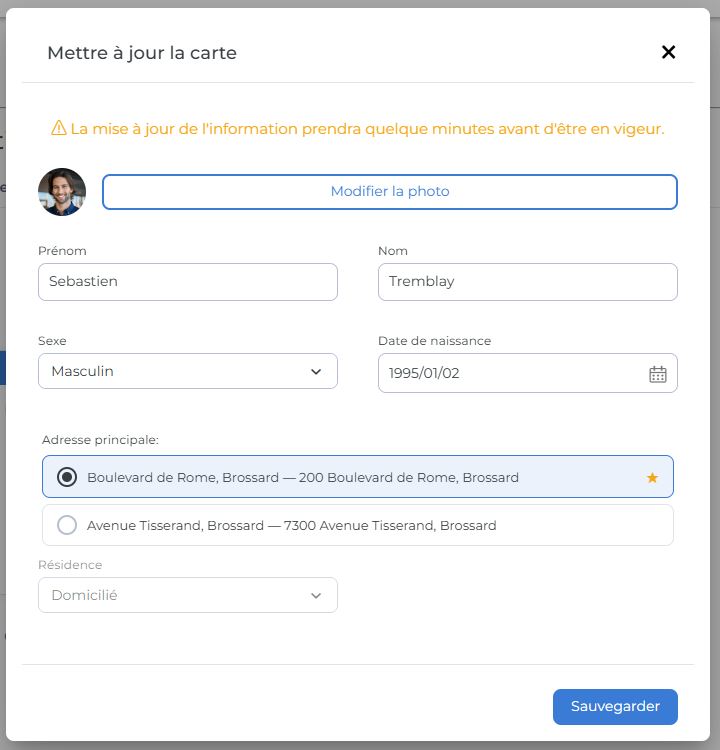
Edit a citizen card
As an administrator, you can change the address linked to a citizen's card from their file.
1
Open the citizen's file and click Edit card
2
The list of their approved addresses is displayed — the star ★ indicates the one currently associated with their card
3
Choose the new address, adjust the residency status if needed, then click Save
📋
All changes are recorded in the citizen file history.
Edit the address linked to the card You choose from the citizen's verified addresses — the star ★ indicates the one currently used on their card.
05
Quick Reference — Badges & Statuses
All badges visible in the bciti+ interface
Each property displays one or more badges indicating its state. Here is what they mean:
Example profile with multiple properties showing different badges
Verification badges
✓ VerifiedProperty approved by the city
⏱ Under reviewSubmitted, pending approval
↺ Get verifiedNot verified — citizen action required